Ingredients
For Harumaki filling
- 150 gramsground pork
- 1 tablespoonsoy sauce
- 1 tablespoonmirin
- 2 teaspoonspotato starch
- ⅛ teaspoonwhite pepper
- 1 tablespoonvegetable oil
- 10 gramsginger (¼-inch knob, minced)
- 75 gramsscallions stems (2-3 stems minced)
- 175 gramscabbage (3-4 leaves, shredded)
- 50 gramscarrots (⅓ carrot, julienned)
- 50 gramsshiitake (2 large mushrooms, chopped)
- 100 gramsbamboo (1 small can, julienned)
- 1 cuplow sodium chicken stock
- 1 tablespoonpotato starch
- 1 teaspoontoasted sesame oil
- Salt (to taste, I used ¼ teaspoon)
For Harumaki
- 10spring roll wrappers
- 1 tablespoonflour
- 1 tablespoonwater
- vegetable oil (for deep-frying)
Instructions
- Marinate the pork by mixing it with the soy sauce, mirin, 2 teaspoons of potato starch, and white pepper until the ingredients are evenly distributed.

2. In a separate bowl, mix the chicken stock, 1 tablespoon of potato starch, and sesame oil.

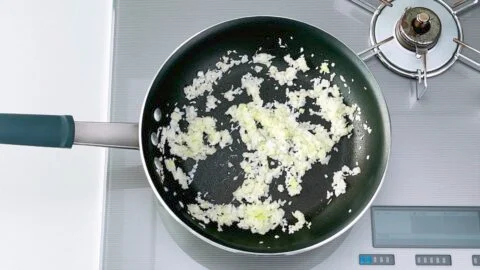
3. Heat a large frying pan over medium-high heat. Add the oil, ginger, and scallion stems and saute for about two minutes until the aromatics are fragrant.
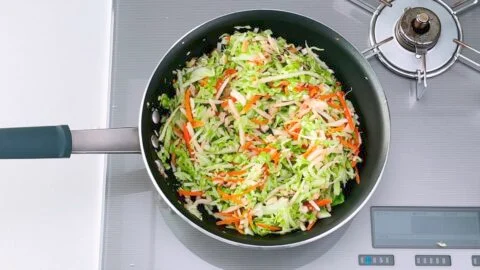
4. Add the remaining vegetables to the pan and stir-fry the mixture until they’re cooked through (about 3 minutes).
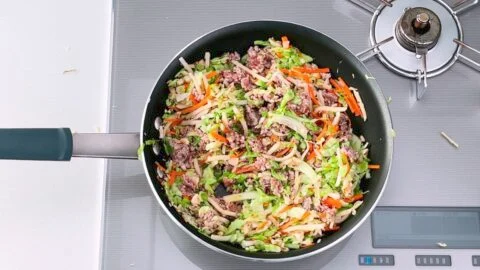
5. Make space in the center of the pan by pushing the veggies to the sides. Add the pork and use a spatula to break it up into small crumbs. When the ground meat is no longer one mass, stir-fry it together with the vegetables until the pork is mostly cooked through.
6. Stir the chicken stock mixture and pour it into the pan. Stir everything together until the pork is fully cooked. Give it a taste and add salt as needed to season (I added ¼ teaspoon).

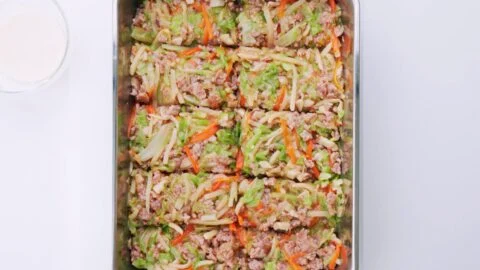
7. The filling needs to cool before you can stuff the Harumaki, and you can speed this up by spreading the mixture in a metal tray and floating it in a cold water bath.

8. While the filling cools, mix the flour and water to make a smooth “glue” that you’re going to use to seal the rolls shut. Separate the wrapper sheets and keep them covered with a damp towel to keep them from drying out and getting brittle.

9. After the filling has cooled to room temperature, I recommend using a tool such as a bench scraper or chopstick to divide the filling into 10 even segments.
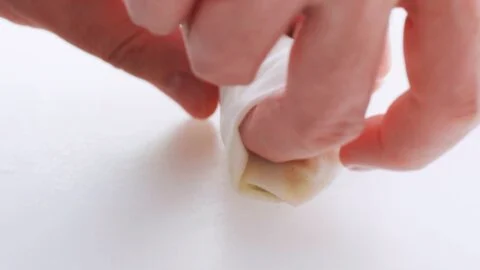
10. To assemble the Harumaki, place a wrapper with a corner pointing towards you. Add one segment of filling to the middle of the lower half of the wrapper.

11. Roll the corner closest to you, up and over the filling, and then continue rolling until you reach the halfway point.

12. Fold the two flaps on either side of the filling towards the center.

13. Spread some of the flour glue onto the wrapper’s top edges and then loosely finish rolling the Harumaki. I usually put the tips of two fingers into either end of the roll as I roll it.
14. Line a bowl or wide cup with 3 sheets of paper towels. This will be used to drain the spring rolls in an upright position, so you want something that’s deep enough to hold the rolls standing up but wide enough that the rolls aren’t overcrowded.
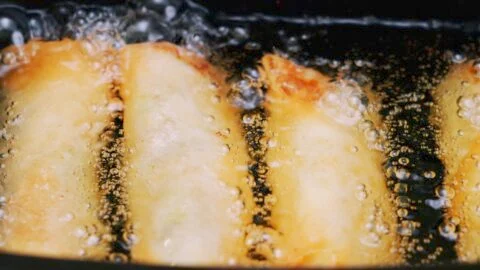
15. Heat a heavy-bottomed pot filled with 1.5-inches of oil to 360 degrees F (180 C) and fry the rolls in batches. They will float, so you need to continue rolling them over so they brown evenly. When the wrapper is crisp, transfer the rolls to the prepared bowl and drain them for a minute before serving them.